Running the workflow#
Run the workflow locally in Python#
To quickly check your workflow code, you can run it in your local Python environment with the following command:
$ union run guides/01_getting_started/ml_workflow/ml_workflow.py main --max_bins 64
If the code runs successfully, you should see output like this:
Running Execution on local.
0.9767441860465116
Run the workflow remotely on Union#
To run the workflow in the cloud on Union, add the --remote option:
$ union run --remote guides/01_getting_started/ml_workflow/ml_workflow.py main --max_bins 64
You should see the following output in your terminal:
👍 Build submitted!
⏳ Waiting for build to finish at: https://serverless.union.ai/org/...
✅ Build completed in 0:01:57!

[✔] Go to https://serverless.union.ai/org/... to see execution in the UI.
When you invoke union run --remote, the system first launches a Union hosted image builder that creates the container images with the Python dependencies required for the tasks in your workflow.
Next, the workflow code is registered to Union (meaning that it is serialized uploaded to Union),
the images defined in ImageSpec blocks are used to initialize the containers for each task, and the workflow is executed.
The first URL in the output above points to the image builder and the second URL points to the workflow execution.
View the workflow execution on Union#
When you view the workflow execution graph, you will see the following:
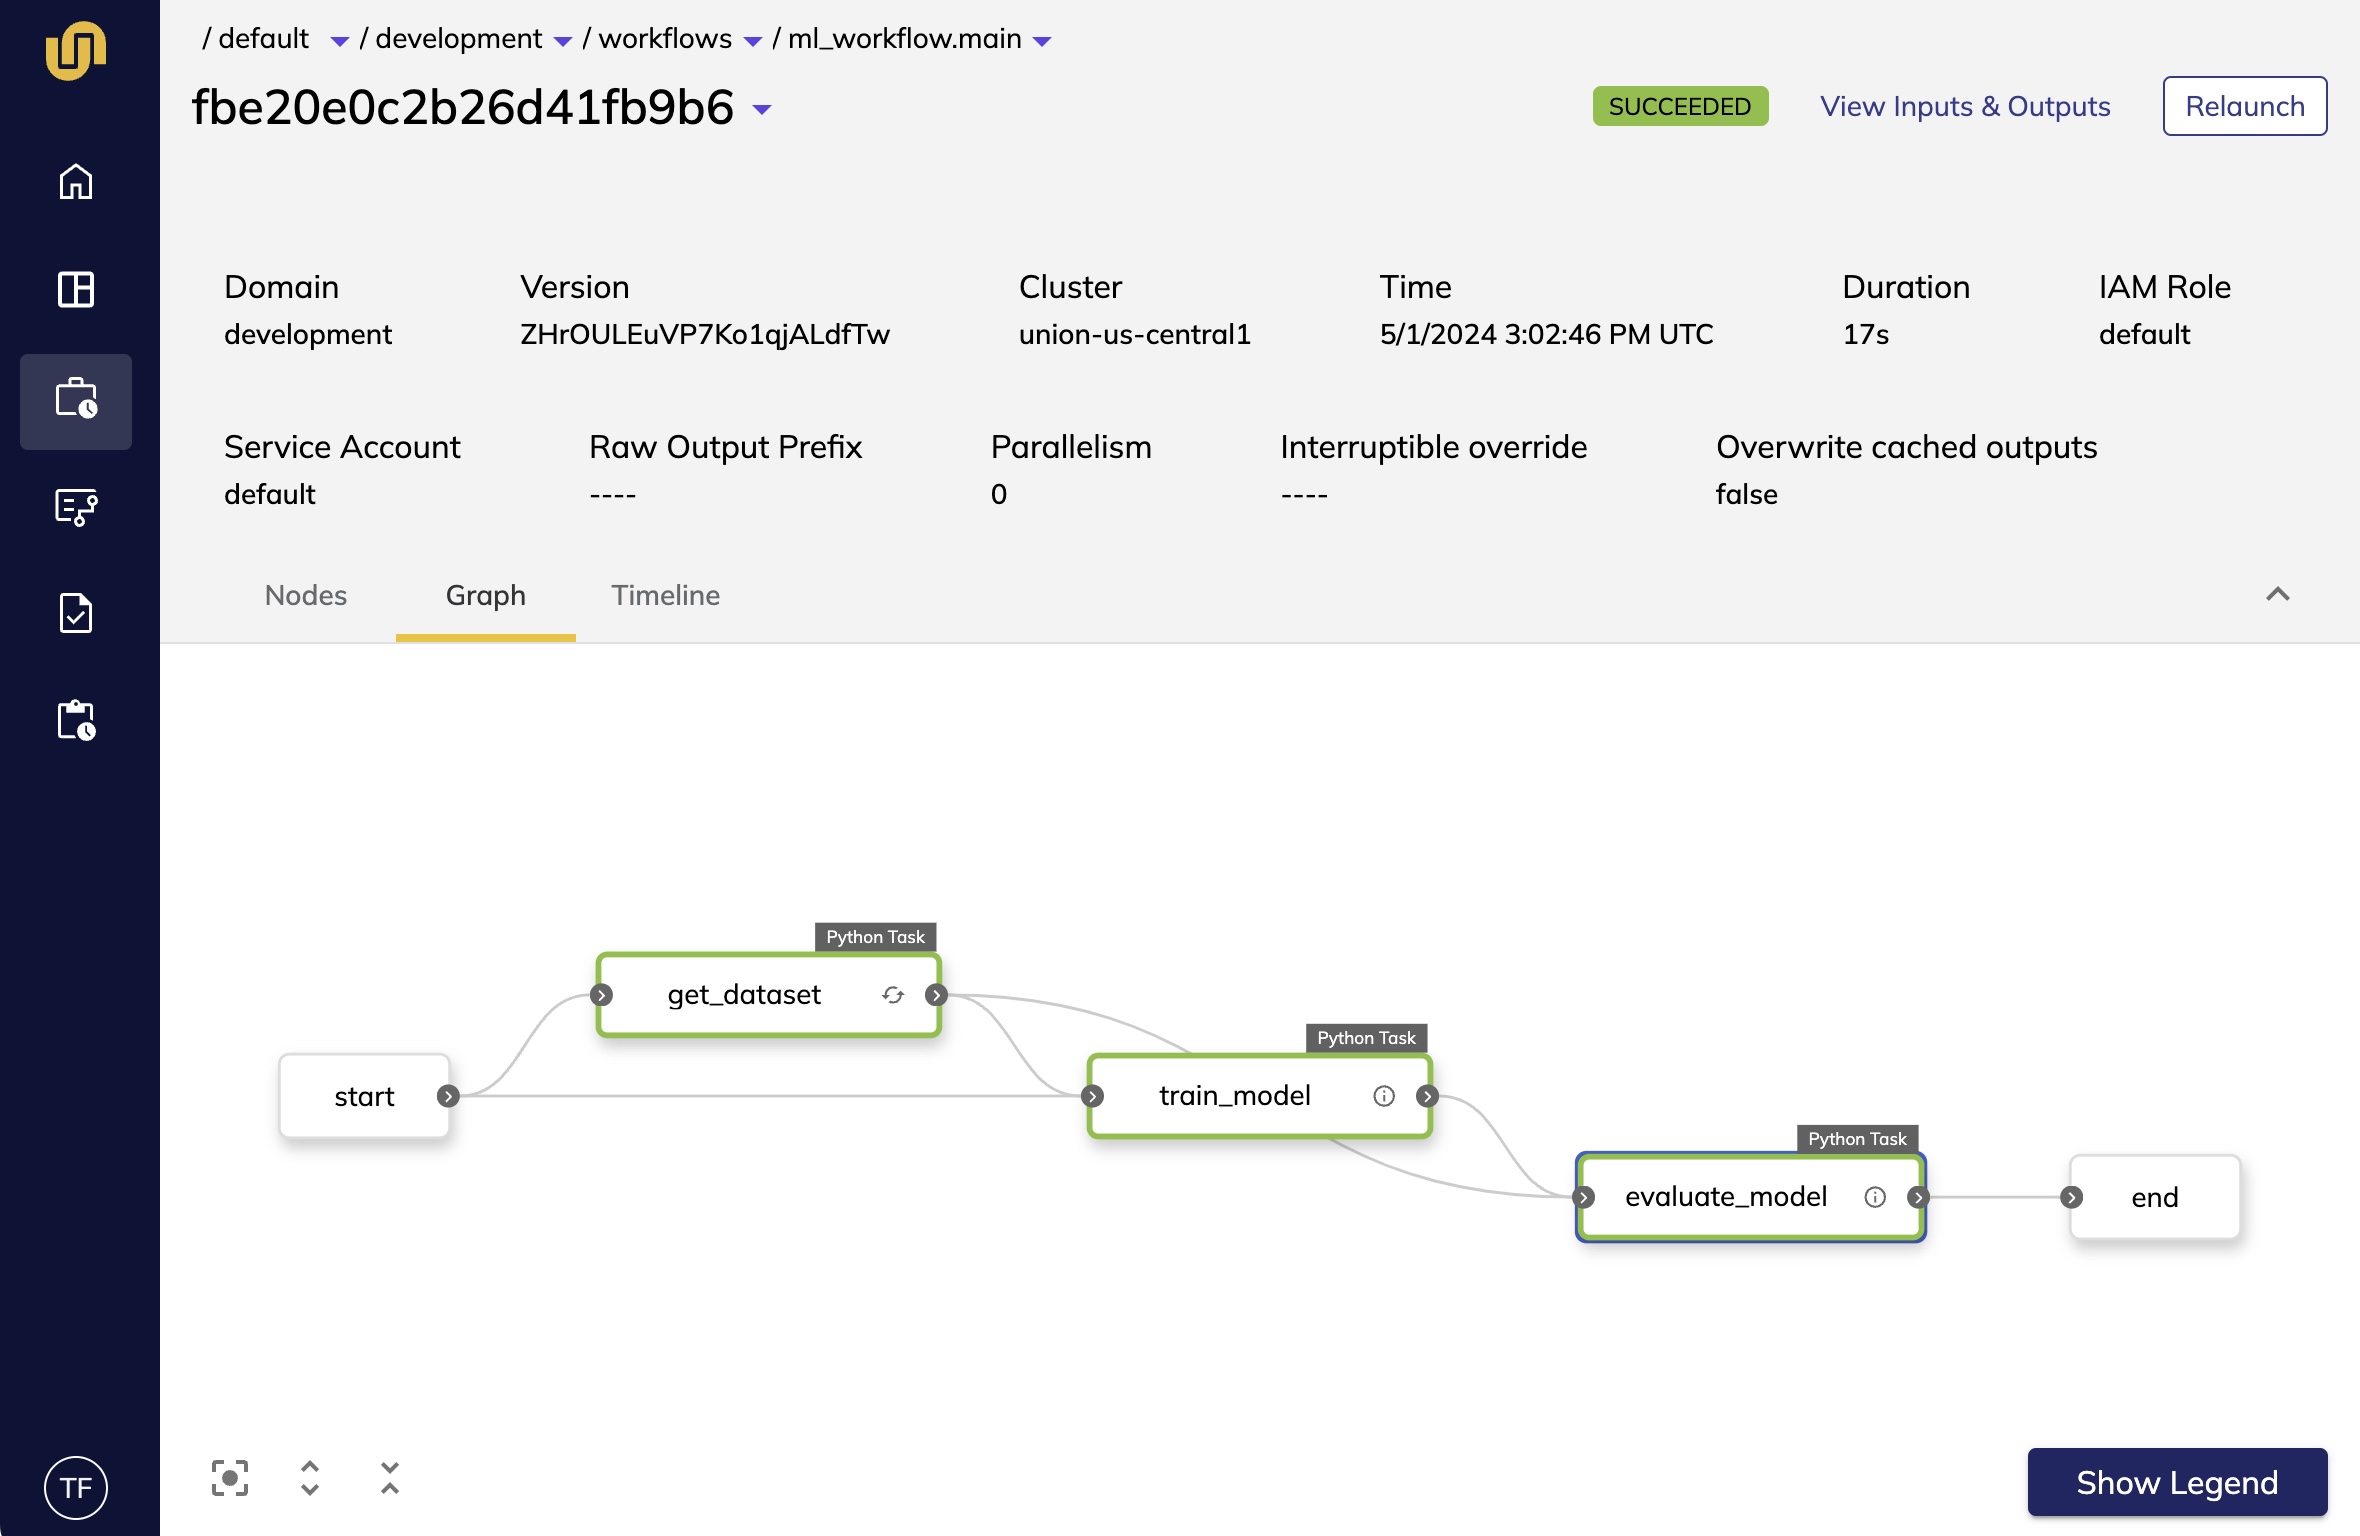
Above the graph, there is metadata that describes the workflow execution, such as the
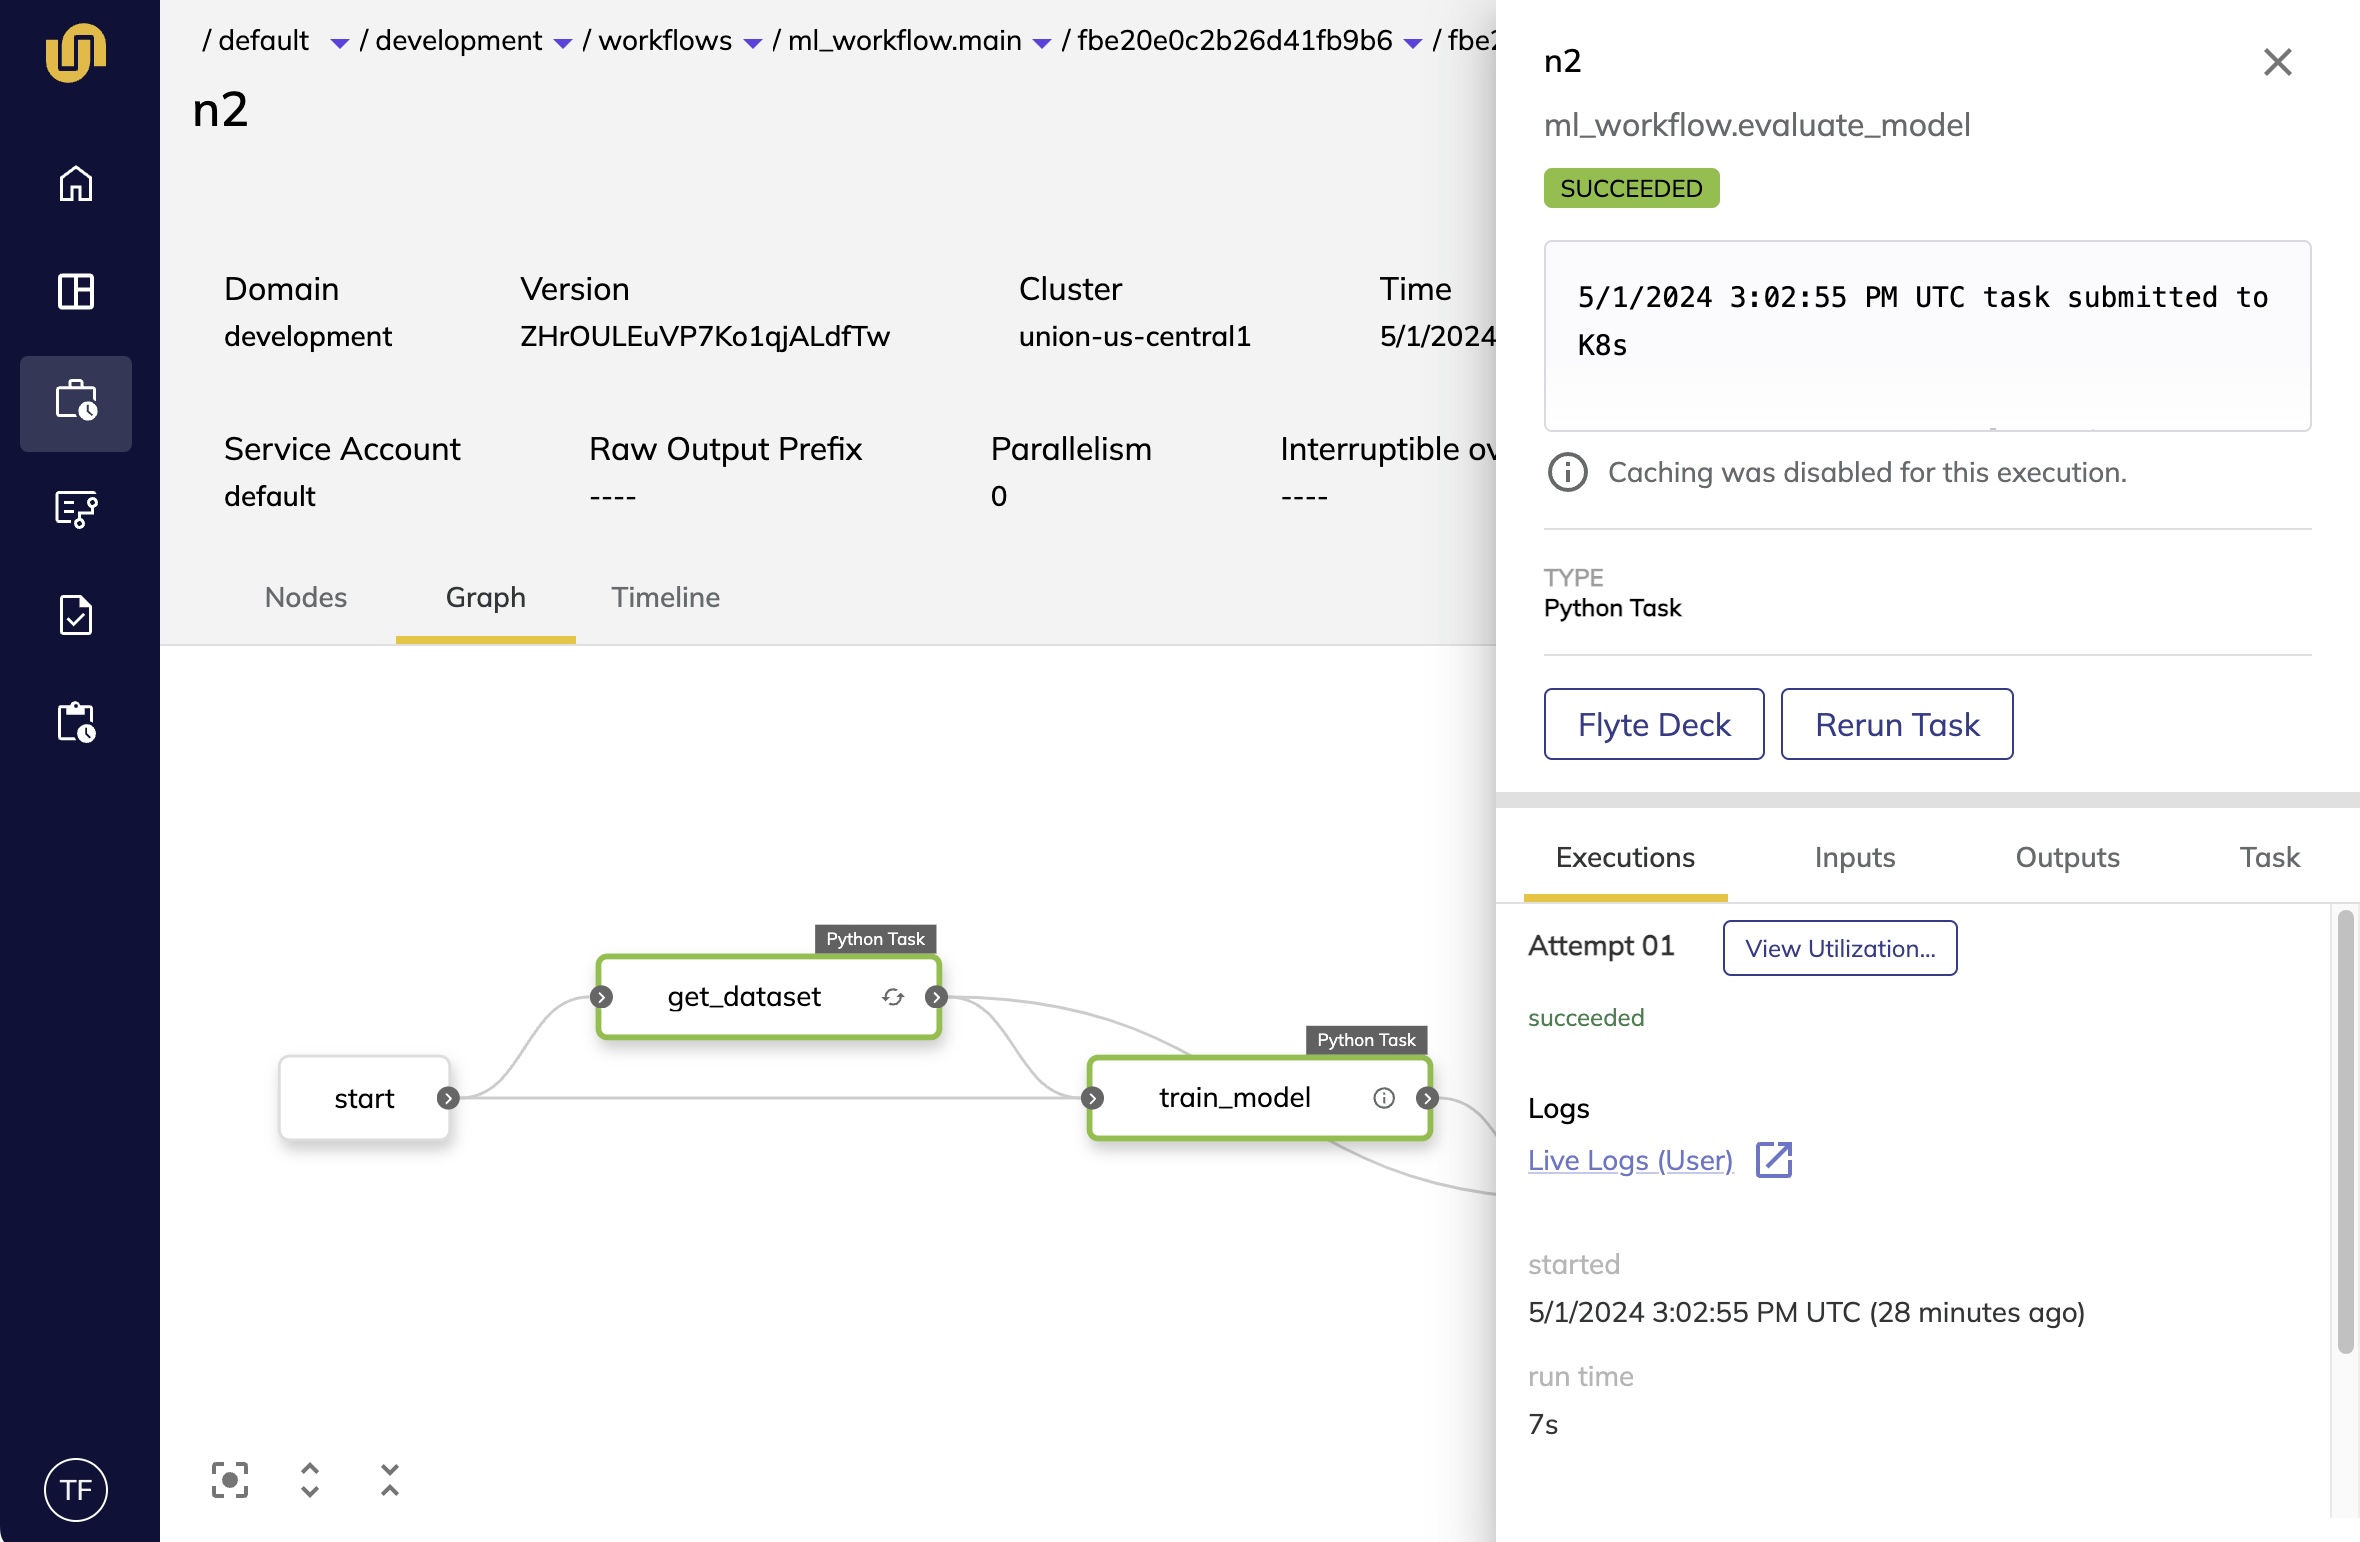
duration and the workflow version. Next, click on the evaluate_model node to open up a
sidebar that contains additional information about the task:
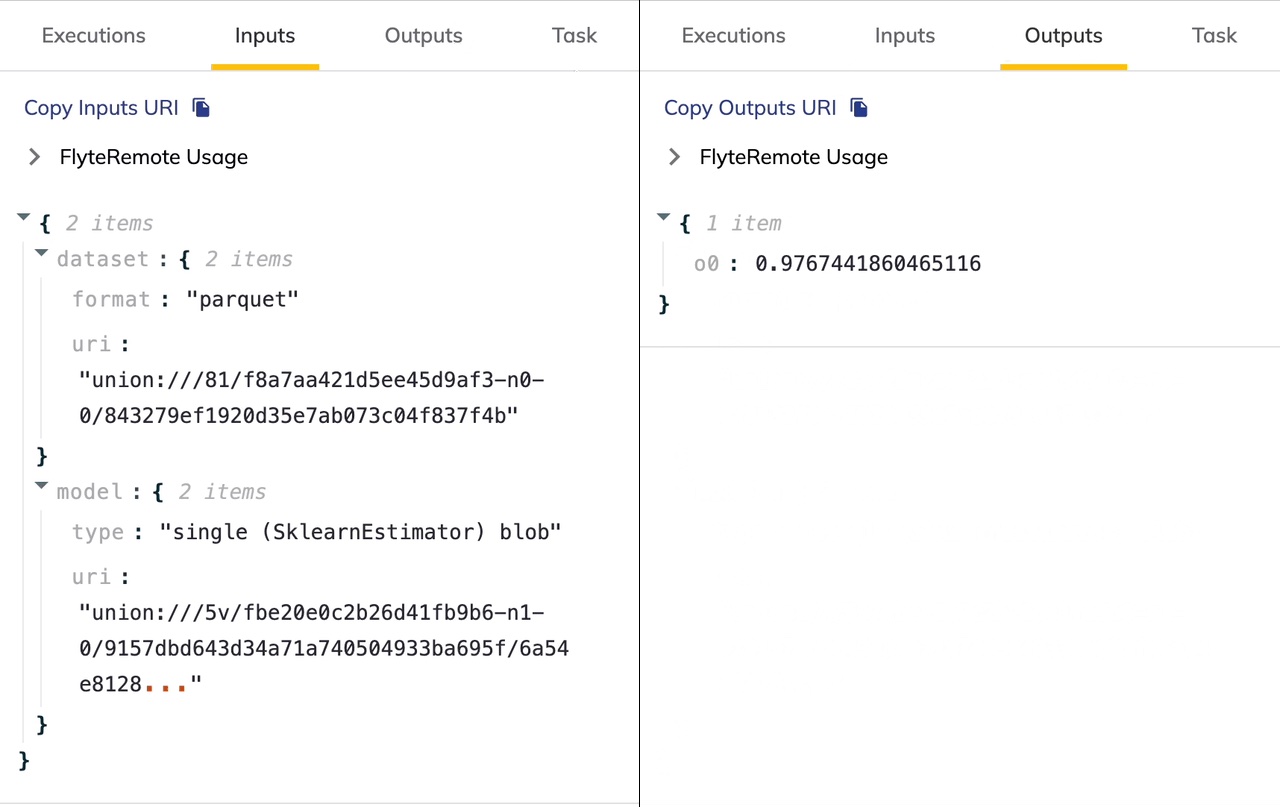
The Inputs and Outputs tabs contains links to data coming into the task and the
task’s output:
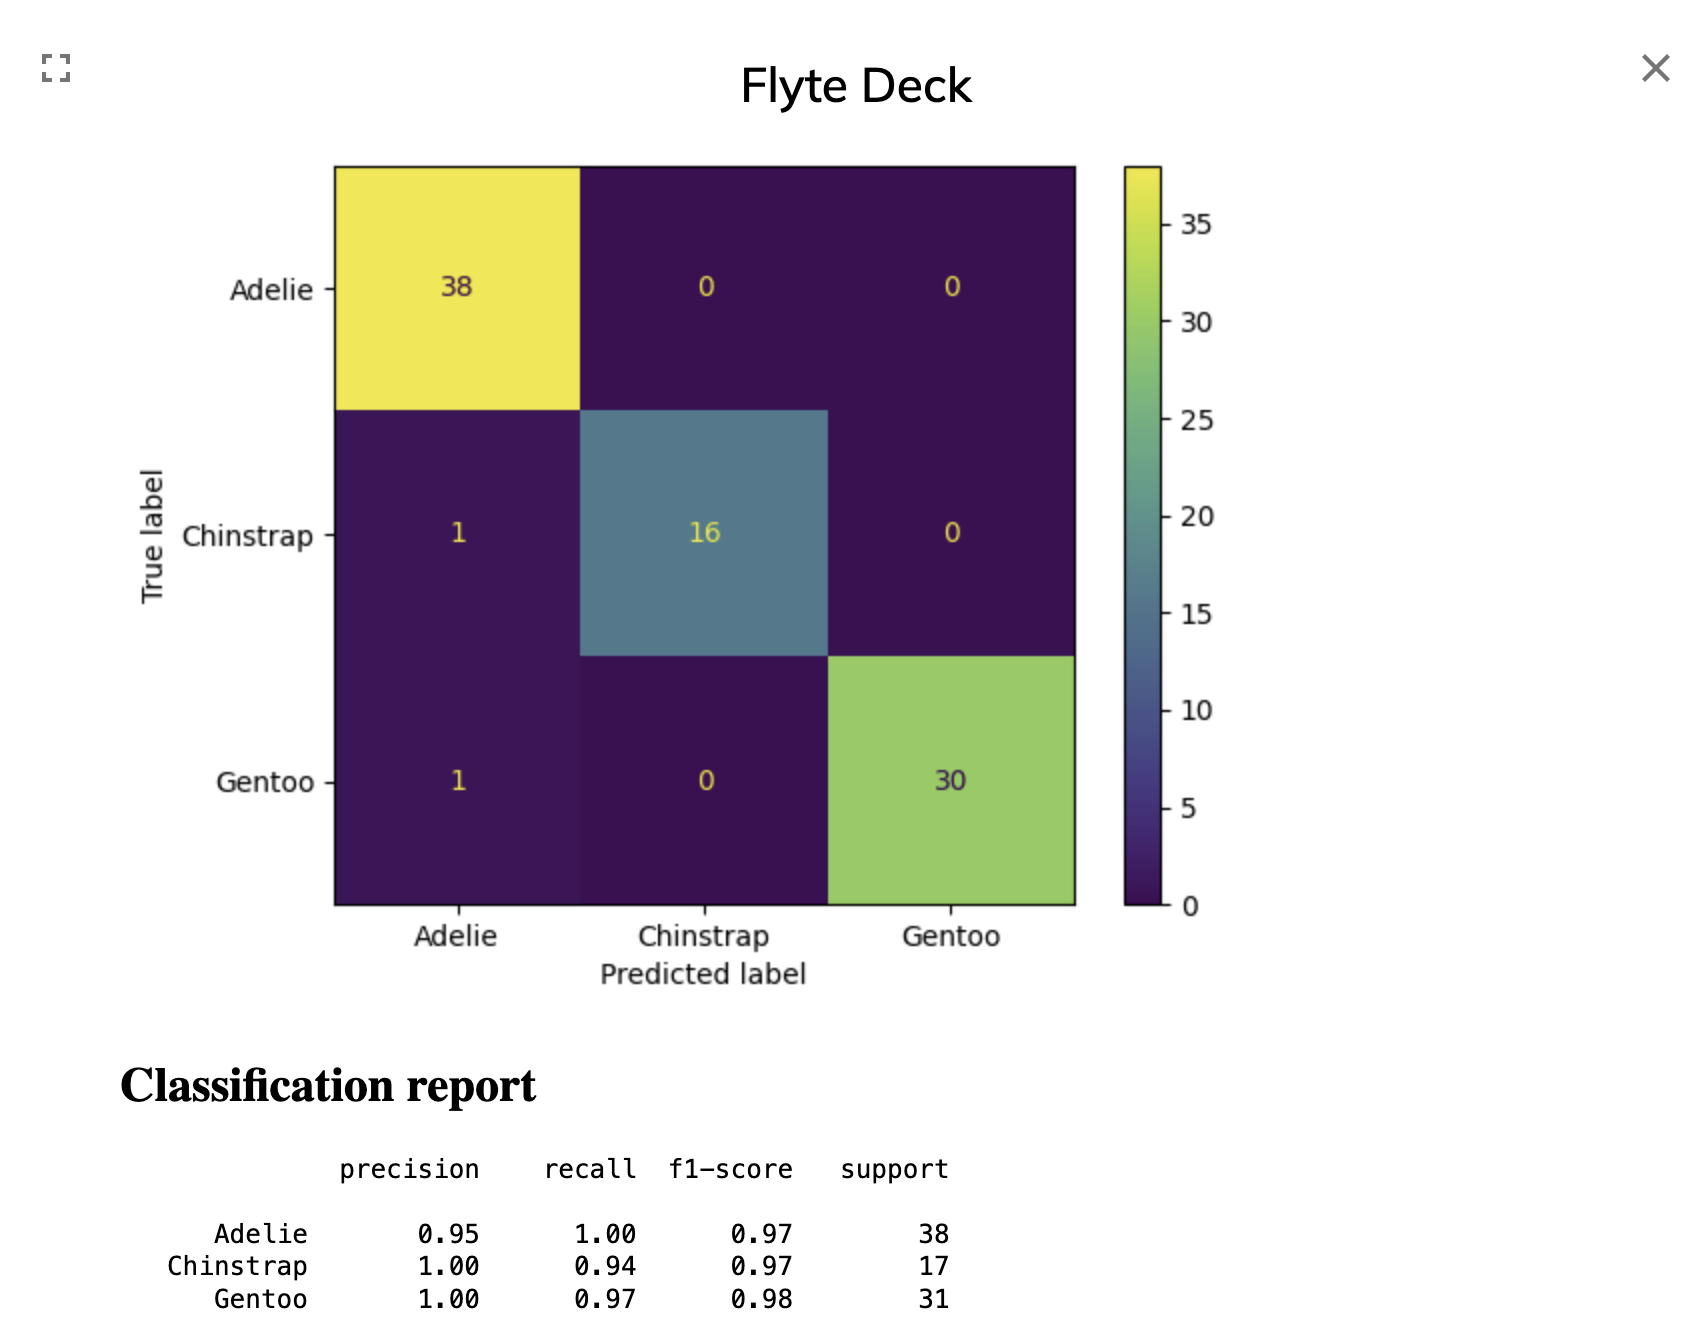
Finally, click on the “Flyte Deck” button in the sidebar to open up visualizations generated by the task:
Now that we are familiar with the UI, let’s jump into the code and see how to build the workflow!
Next step#
The next step is to take a look at the Example code components.