Debugging with interactive tasks#
With interactive tasks you can inspect and debug live task code directly in the UI in an embedded Visual Studio Code IDE.
Enabling interactive tasks in your code#
To enable interactive tasks, you need to:
Include
flytekitplugins-flyteinteractiveas a dependencyUse the
@vscodedecorator on the tasks you want to make interactive.
The @vscode decorator, when applied, converts a task into a Visual Studio Code server during runtime.
This process overrides the standard execution of the task’s function body, initiating a command to start a Visual Studio Code server instead.
No need for ingress or port forwarding
The Union interactive tasks feature is an adaptation of the open-source FlyteInteractive plugin. It improves on the open-source version by removing the need for ingress configuration or port forwarding, providing a more seamless debugging experience.
Basic example#
The following example demonstrates interactive tasks in a simple workflow.
requirements.txt#
This requirements.txt file is used by all the examples in this section:
flytekit
flytekitplugins-flyteinteractive
example.py#
"""Union workflow example of interactive tasks (@vscode)"""

import union
from flytekitplugins.flyteinteractive import vscode

image = union.ImageSpec(
   builder="union",
   name="interactive-tasks-example",
   requirements="requirements.txt"
)

@union.task(container_image=image)
@vscode
def say_hello(name: str) -> str:
   s = f"Hello, {name}!"
   return s

@union.workflow
def wf(name: str = "world") -> str:
   greeting = say_hello(name=name)
   return greeting
Register and run the workflow#
To register the code to a project on Union as usual and run the workflow.
Access the IDE#
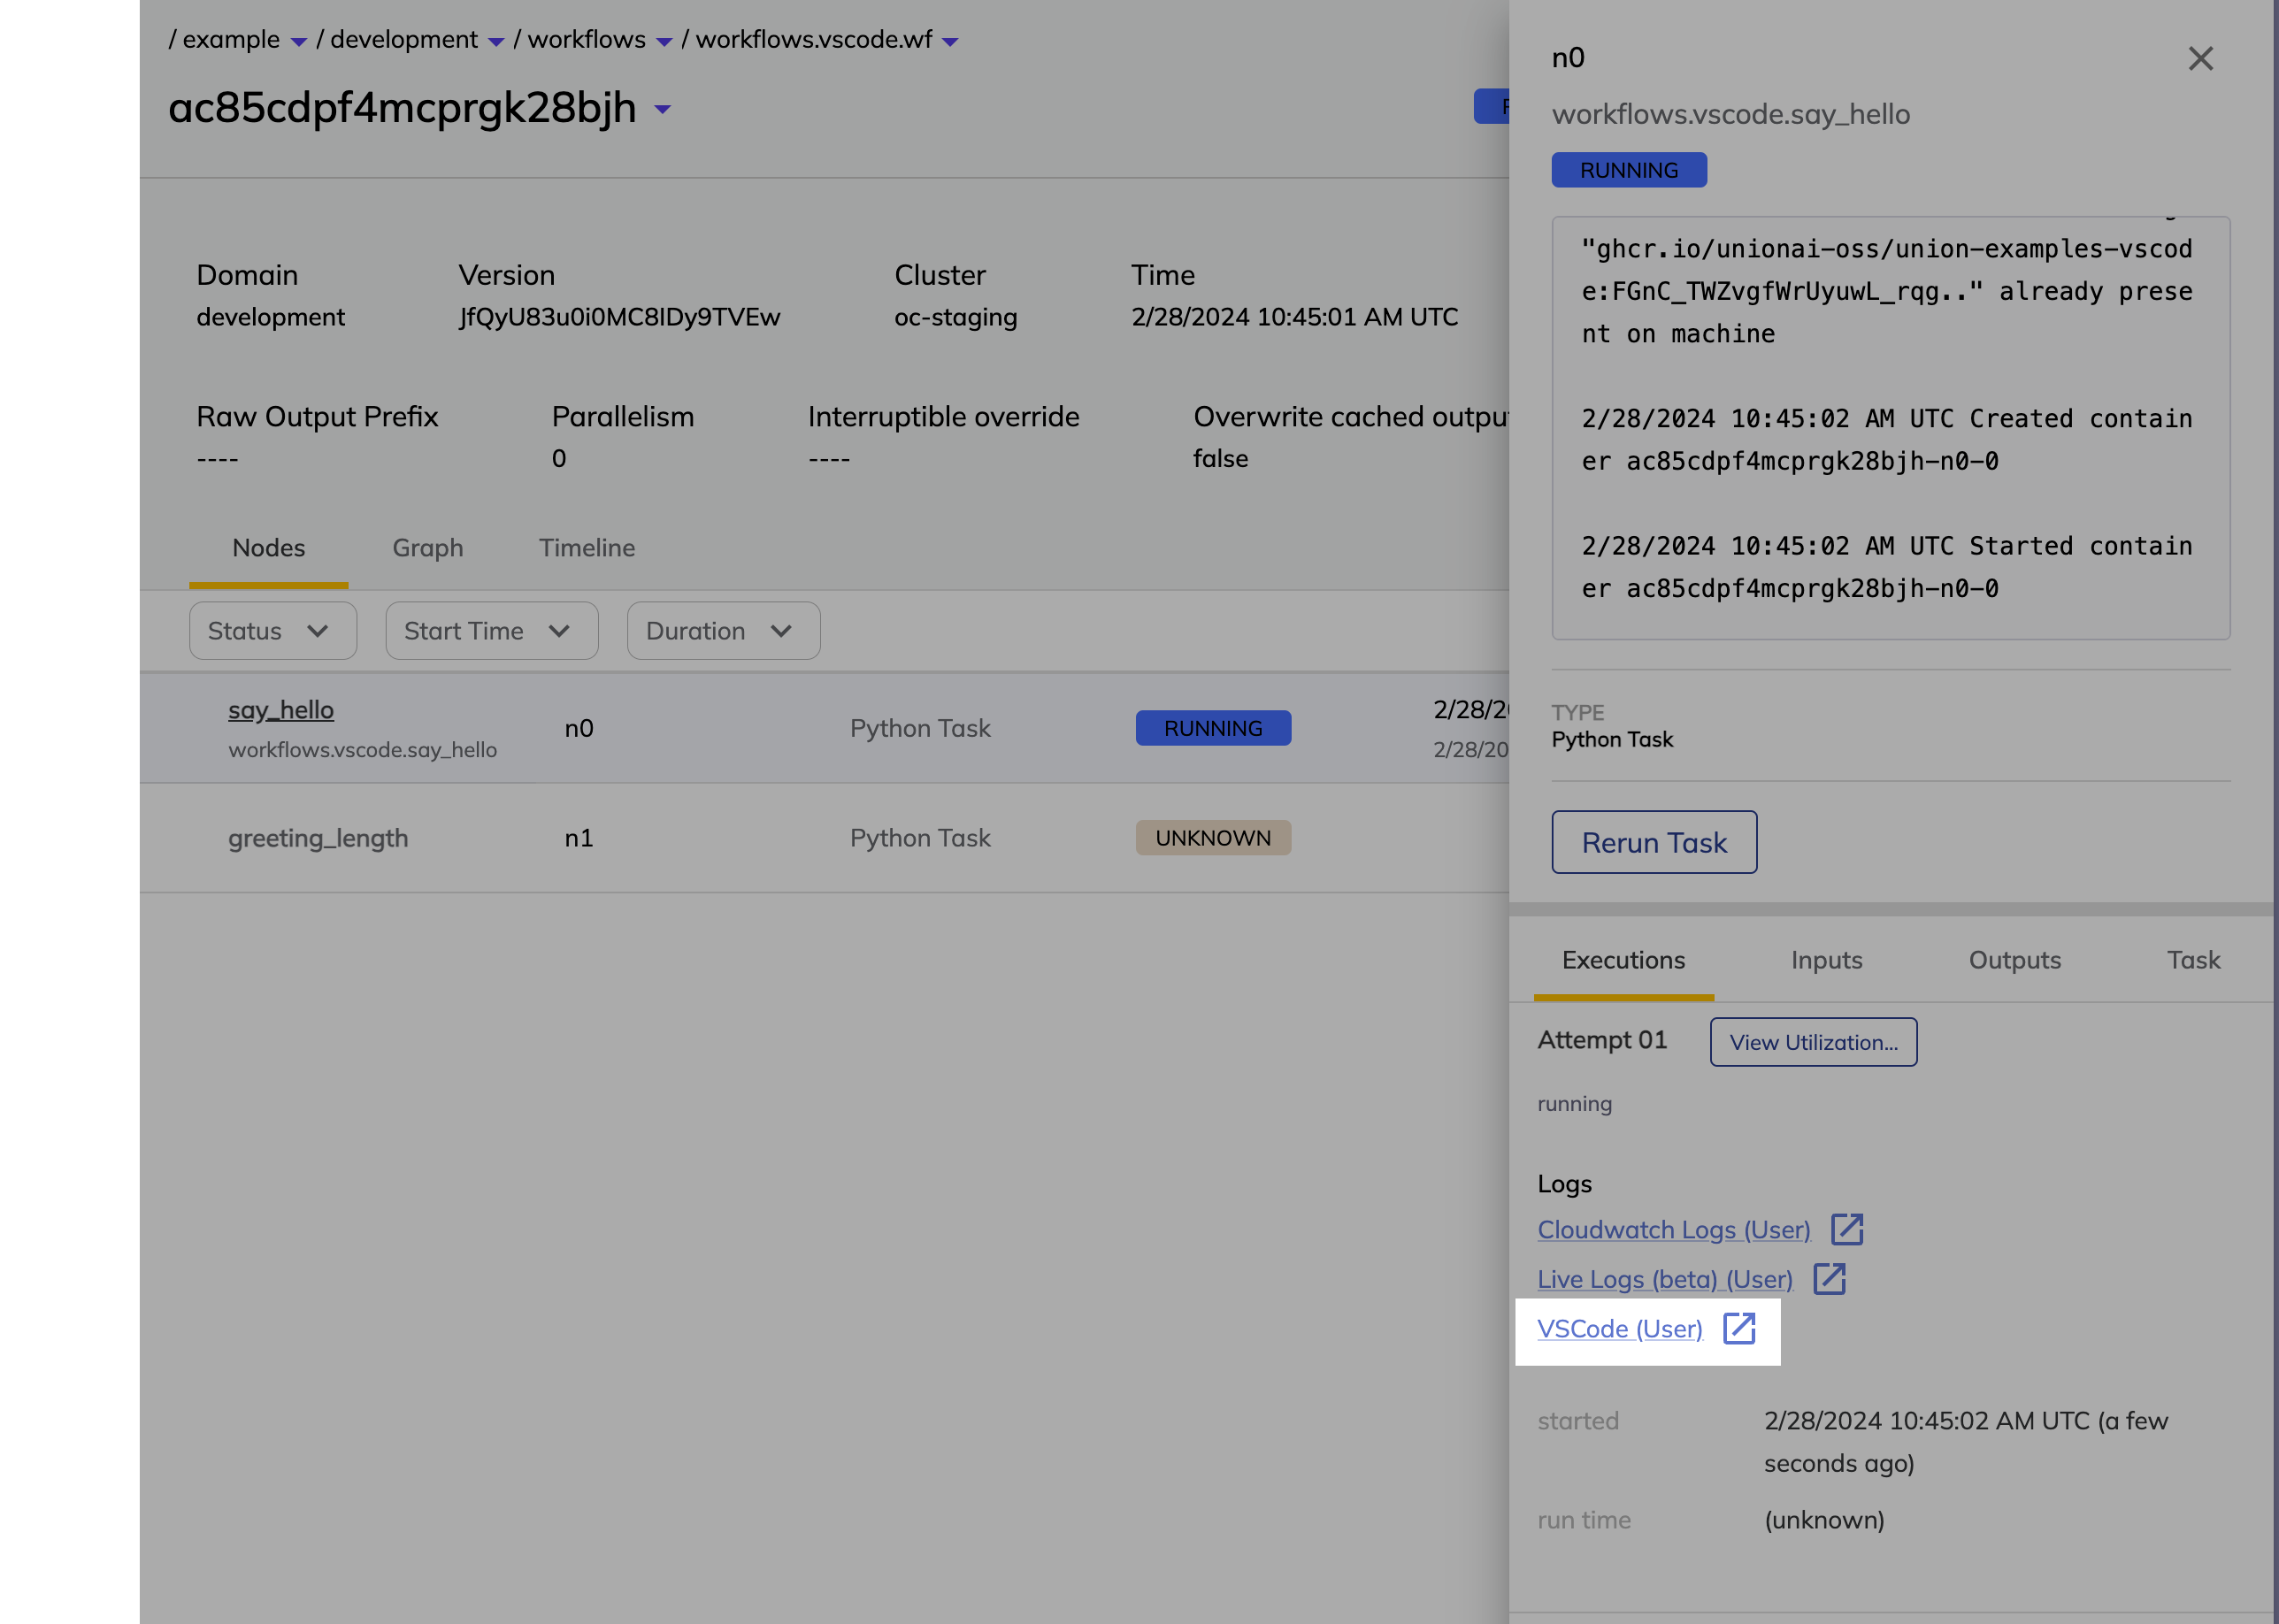
Select the first task in the workflow page (in this example the task is called
say_hello). The task info pane will appear on the right side of the page.Wait until the task is in the Running state and the VSCode (User) link appears.
Click the VSCode (User) link.
Inspect the task code#
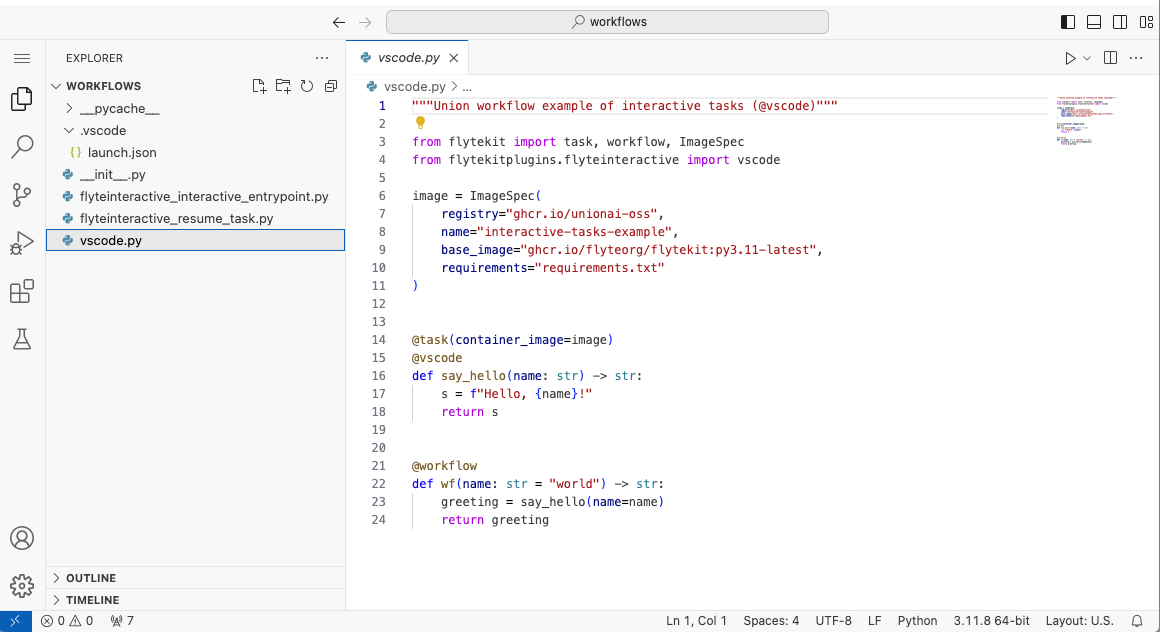
Once the IDE opens, you will be able to see your task code in the editor.
Interactive debugging#
To run the task in VSCode, click the Run and debug symbol on the left rail of the IDE and select the Interactive Debugging configuration.
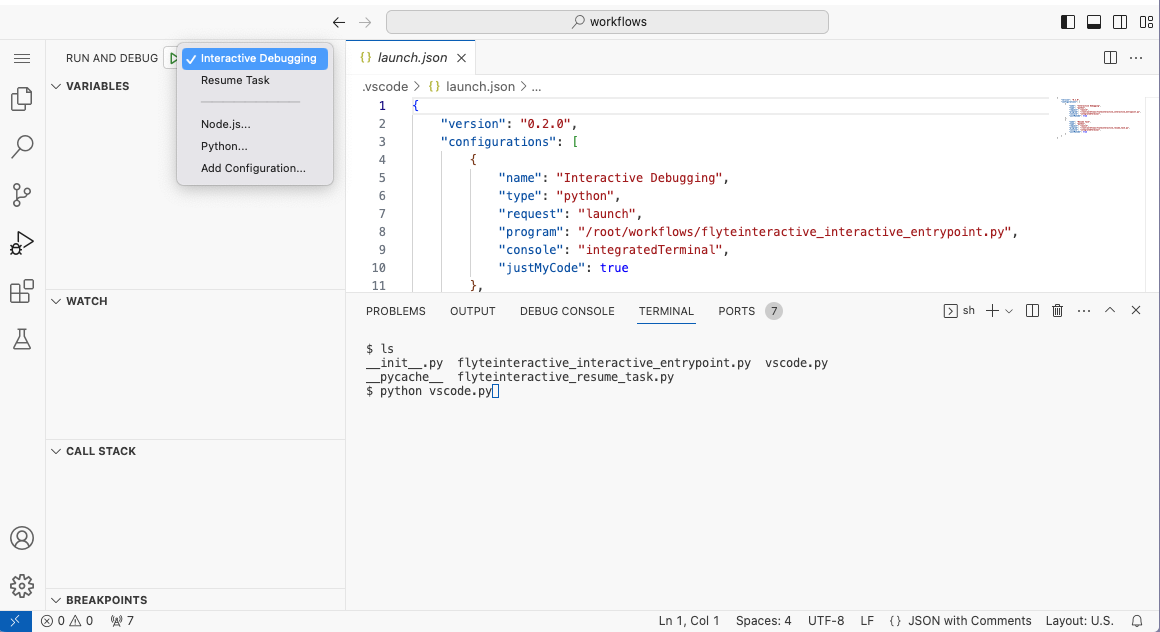
Click the Play button beside the configuration drop-down to run the task. This will run your task with inputs from the previous task. To inspect intermediate states, set breakpoints in the Python code and use the debugger for tracing.
No task output written to Union storage
It’s important to note that during the debugging phase the task runs entirely within VSCode and does not write the output to Union storage.
Update your code#
You can edit your code in the VSCode environment and run the task again to see the changes. Note, however, that the changes will not be automatically persisted anywhere. You will have to manually copy and paste the changes back to your local environment.
Resume task#
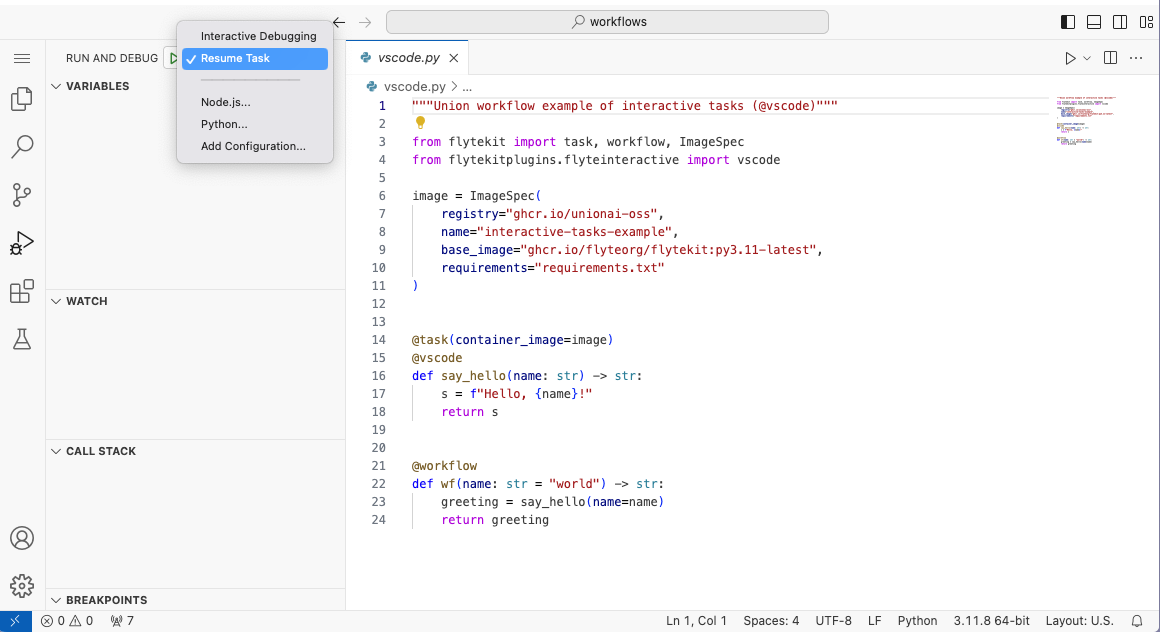
After you finish debugging, you can resume your task with updated code by executing the Resume Task configuration. This will terminate the code server, run the task with inputs from the previous task, and write the output to Union storage.
Remember to persist your code
Remember to persist your code (for example, by checking it into GitHub) before resuming the task, since you will lose the connection to the VSCode server afterwards.
Auxiliary Python files#
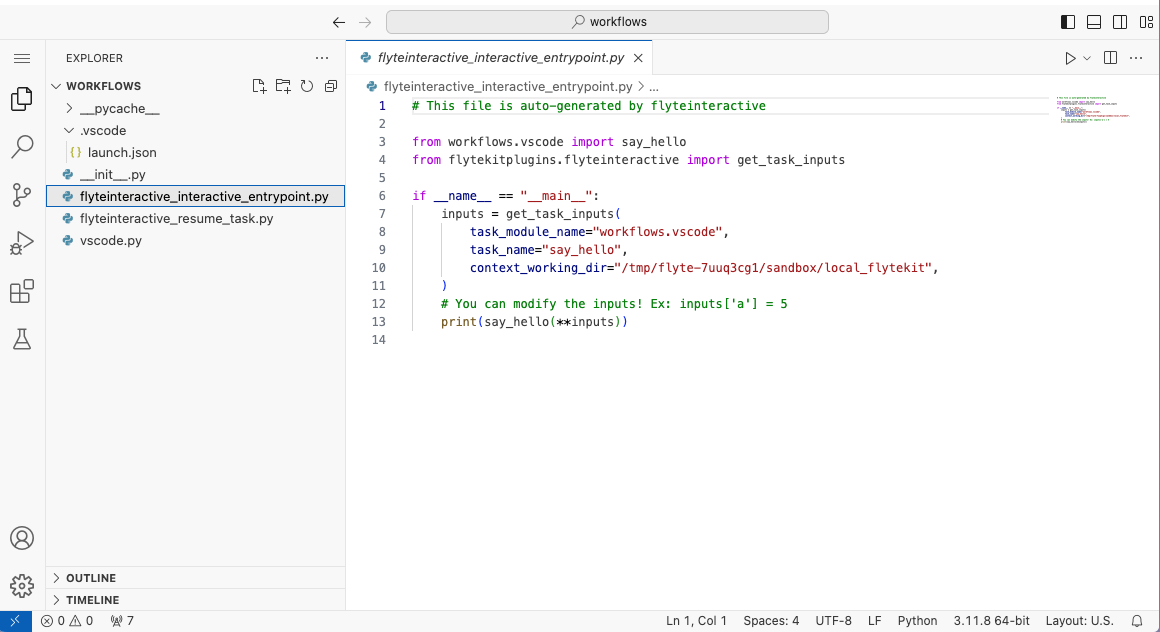
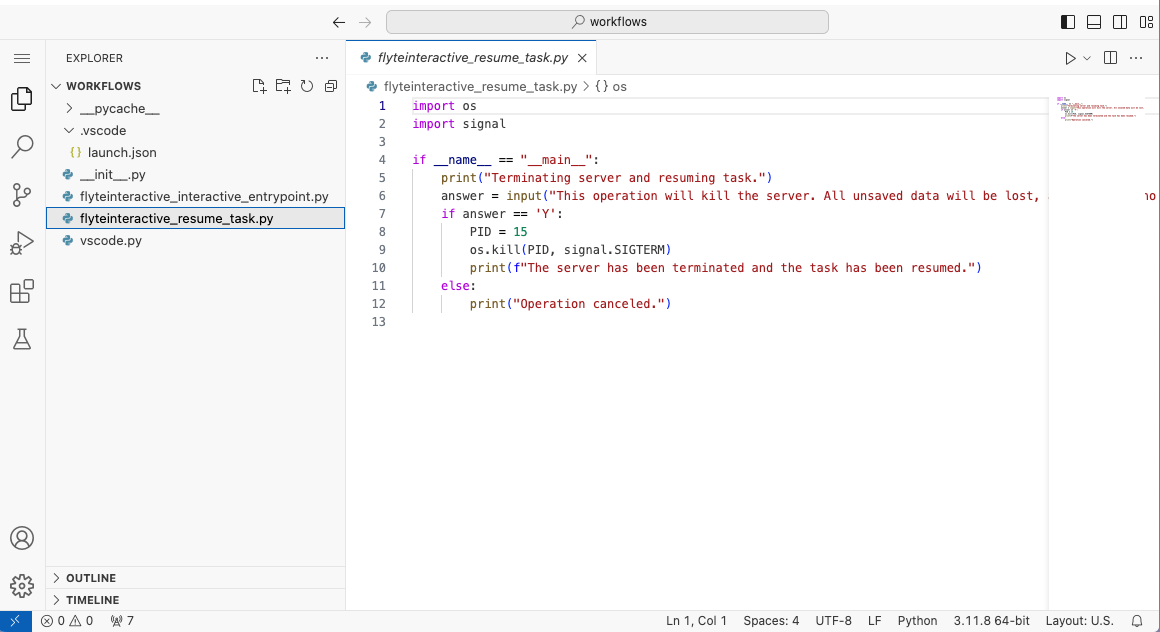
You will notice that aside from your code, there are some additional files in the VSCode file explorer that have been automatically generated by the system:
flyteinteractive_interactive_entrypoint.py#
The flyteinteractive_interactive_entrypoint.py script implements the Interactive Debugging action that we used above:
flyteinteractive_resume_task.py#
The flyteinteractive_resume_task.py script implements the Resume Task action that we used above:
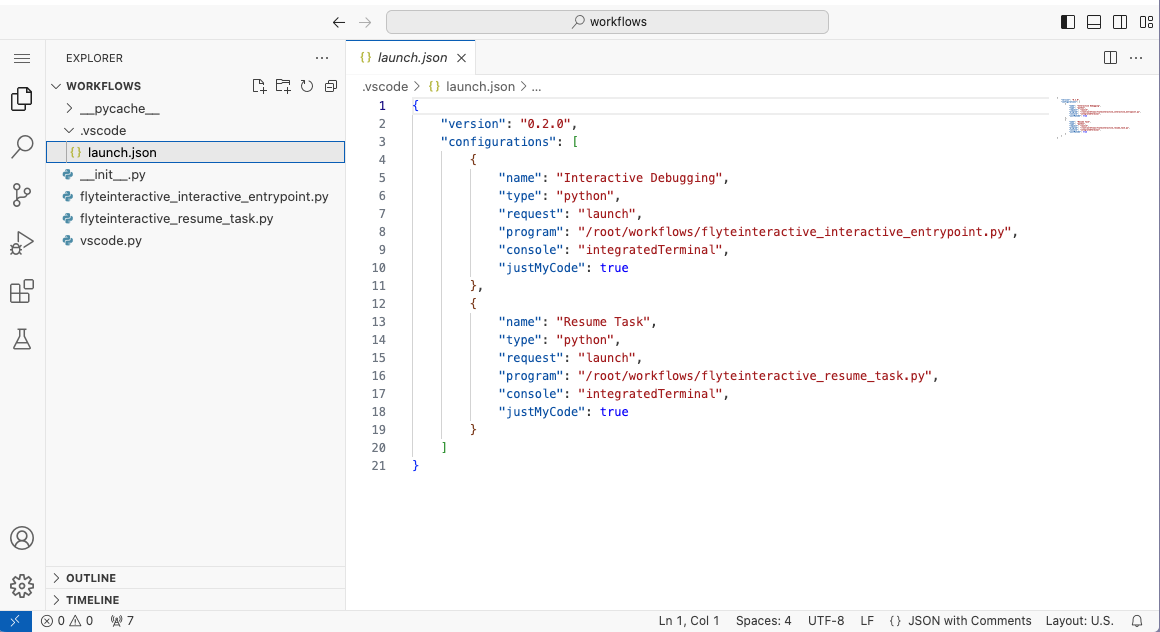
launch.json#
The launch.json file in the .vscode directory configures the Interactive Debugging and Resume Task actions.
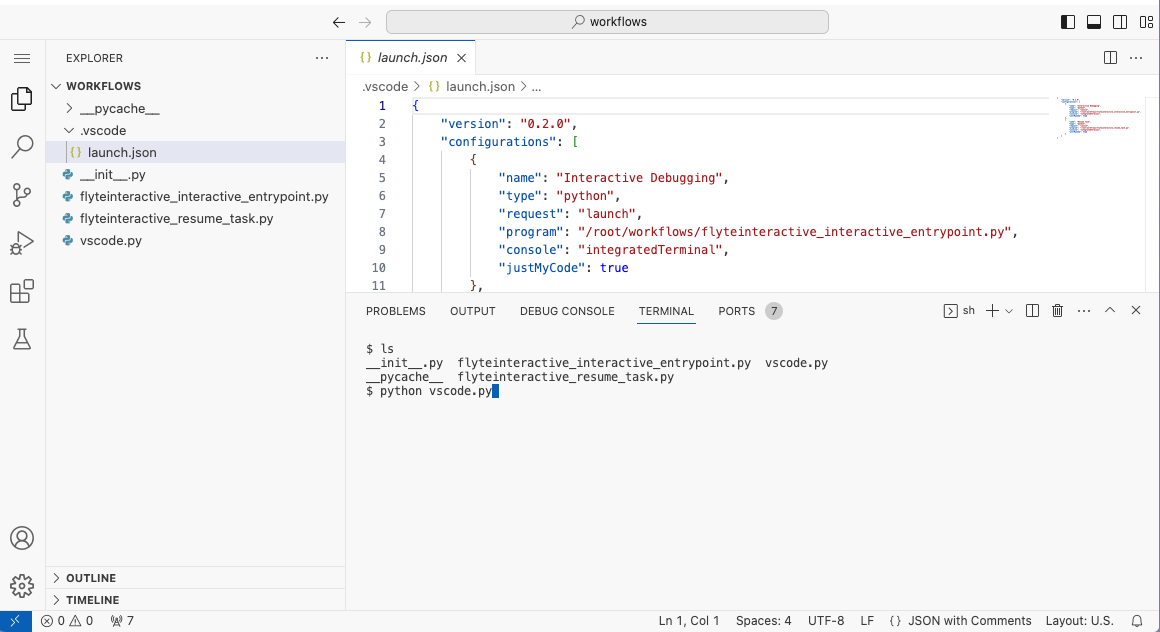
Integrated terminal#
In addition to using the convenience functions defined by the auxiliary files, you can also run your Python code script directly from the integrated terminal using python <script_name>.py (in this example, python hello.py).
Install extensions#
As with local VSCode, you can install a variety of extensions to assist development. Available extensions differ from official VSCode for legal reasons and are hosted on the Open VSX Registry.
Python and Jupyter extensions are installed by default.
Additional extensions can be added by defining a configuration object and passing it to the @vscode decorator, as shown below:
example-extensions.py#
"""Union workflow example of interactive tasks (@vscode) with extensions"""

import union
from flytekitplugins.flyteinteractive import COPILOT_EXTENSION, VscodeConfig, vscode

image = union.ImageSpec(
   builder="union",
   name="interactive-tasks-example",
   requirements="requirements.txt"
)

config = VscodeConfig()
config.add_extensions(COPILOT_EXTENSION)  # Use predefined URL
config.add_extensions(
    "https://open-vsx.org/api/vscodevim/vim/1.27.0/file/vscodevim.vim-1.27.0.vsix"
)  # Copy raw URL from Open VSX

@union.task(container_image=image)
@vscode(config=config)
def say_hello(name: str) -> str:
   s = f"Hello, {name}!"
   return s

@union.workflow
def wf(name: str = "world") -> str:
   greeting = say_hello(name=name)
   return greeting
Manage resources#
To manage resources, the VSCode server is terminated after a period of idleness (no active HTTP connections). Idleness is monitored via a heartbeat file.
The max_idle_seconds parameter can be used to set the maximum number of seconds the VSCode server can be idle before it is terminated.
example-manage-resources.py#
"""Union workflow example of interactive tasks (@vscode) with max_idle_seconds"""

import union
from flytekitplugins.flyteinteractive import vscode

image = union.ImageSpec(
   builder="union",
   name="interactive-tasks-example",
   requirements="requirements.txt"
)

@union.task(container_image=image)
@vscode(max_idle_seconds=60000)
def say_hello(name: str) -> str:
   s = f"Hello, {name}!"
   return s

@union.workflow
def wf(name: str = "world") -> str:
   greeting = say_hello(name=name)
   return greeting
Pre and post hooks#
Interactive tasks also allow the registration of functions to be executed both before and after VSCode starts. This can be used for tasks requiring setup or cleanup.
example-pre-post-hooks.py#
"""Union workflow example of interactive tasks (@vscode) with pre and post hooks"""

import union
from flytekitplugins.flyteinteractive import vscode

image = union.ImageSpec(
   builder="union",
   name="interactive-tasks-example",
   requirements="requirements.txt"
)

def set_up_proxy():
    print("set up")

def push_code():
    print("push code")

@union.task(container_image=image)
@vscode(pre_execute=set_up_proxy, post_execute=push_code)
def say_hello(name: str) -> str:
   s = f"Hello, {name}!"
   return s

@union.workflow
def wf(name: str = "world") -> str:
   greeting = say_hello(name=name)
   return greeting
Only initiate VSCode on task failure#
The system can also be set to only initiate VSCode after a task failure, preventing task termination and thus enabling inspection.
This is done by setting the run_task_first parameter to True.
example-run-task-first.py#
"""Union workflow example of interactive tasks (@vscode) with run_task_first"""

import union
from flytekitplugins.flyteinteractive import vscode

image = union.ImageSpec(
   builder="union",
   name="interactive-tasks-example",
   requirements="requirements.txt"
)

@union.task(container_image=image)
@vscode(run_task_first=True)
def say_hello(name: str) -> str:
   s = f"Hello, {name}!"
   return s

@union.workflow
def wf(name: str = "world") -> str:
   greeting = say_hello(name=name)
   return greeting